Staying in touch can be really tough when your friends and family live far and wide. Once upon a time, people often didn’t move far from the place they grew up, today your childhood friend may have moved her family to Canada, while your granddaughter is at university in Rome.
It’s not easy to stay connected when the people you care about are so spread out, but there is one helpful solution…
Technology is a fantastic tool for keeping us all connected, wherever we are in the world. Skype is one of the most popular tools available - and it’s free to download and use. Skype allows users to communicate “face to face” from anywhere on the planet. This video chat tool is used by 300 million people every month, and it’s something many of your nearest and dearest will already have installed on their computers.
Ready to get connected with Skype? This simple Skype guide will explain how to create a Skype account and help you get set up to try your first call...
1. Download Skype
The first step in creating your Skype account is downloading the programme to your computer. To do this, visit the Skype website and click the “Download Skype” or “Get Skype” button. The website will then present you with a few different options:
- Device: First select the device you are using which you want to download Skype to. If you are using a computer, choose “desktop”. If you are using a tablet, choose the “tablet” option, and so forth.
- Operating system: You should see a dropdown menu which might say “Get Skype for Windows” or “Get Skype for Mac”. Choose the correct option for your operating system.
When you select this option, you should see a file downloading within your browser (be aware this may appear differently if you are using a Mac).

2. Install Skype
Once the file has finished downloading, double click it to open. This will launch a new window which will likely include a list of files or icons.
Double click on the file which has the word Skype in the name and ends with .exe. This should open a new window asking for permission to install Skype. Click “Yes”, then click “Install” when prompted.
You should now see a green loading bar which will tell you about the progress of your installation. This completes step 2 of your guide to Skype – you’re almost there!
3. Set up an account
Once the installation is complete a blue Skype box should open. Click through, then select “sign in with Microsoft”. Now, to continue following our Skype guide, you will need to create a Skype user account.
If you already have a Microsoft account (i.e. an email address ending with Hotmail, Outlook, MSN or Live) you may be able to simply sign in with your usual email address and password. If not, or if this doesn’t work, you will need to select the “No account? Create one” option to progress in making your Skype account.
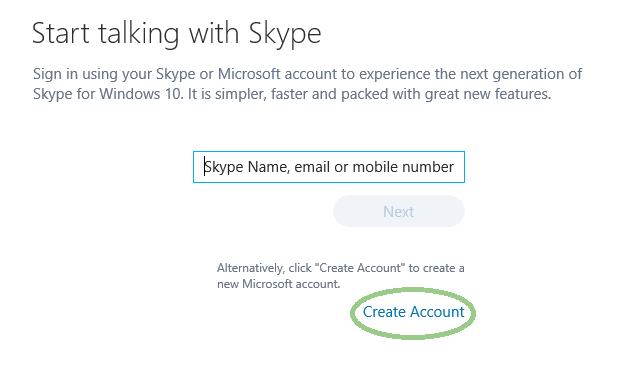
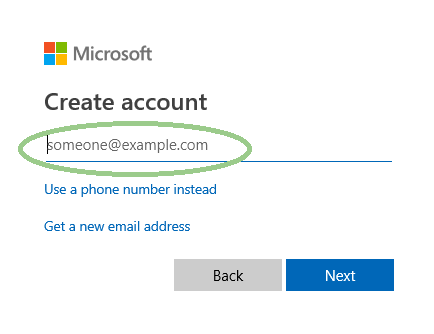
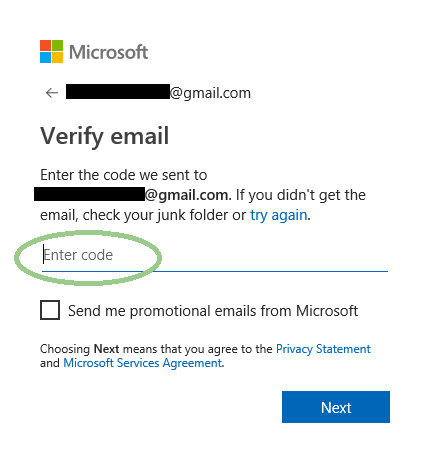
To create a Skype account, you will need to provide either your telephone number or your email address. Follow the prompts through the process of setting up a password and entering your name. A verification email or message will be sent to your chosen device. To finalise the installation and progress in this guide to Skype, you’ll need to confirm your account by entering the code you have been sent.
You may also be prompted to follow steps including choosing a theme and uploading a photograph. Don’t worry, these steps are straightforward, but if you don’t want to tackle them now, simply select “Skip” in the top right-hand corner.
Once this has been done, your account should be set up and you have completed the main part in this guide to Skype. Congratulations!
4. Add a contact
Following creating your Skype account, now it’s time to add your contacts to Skype so you can call your friends and family. Click the “+Contact” button at the top of the left-hand side menu and choose “add new contact”.
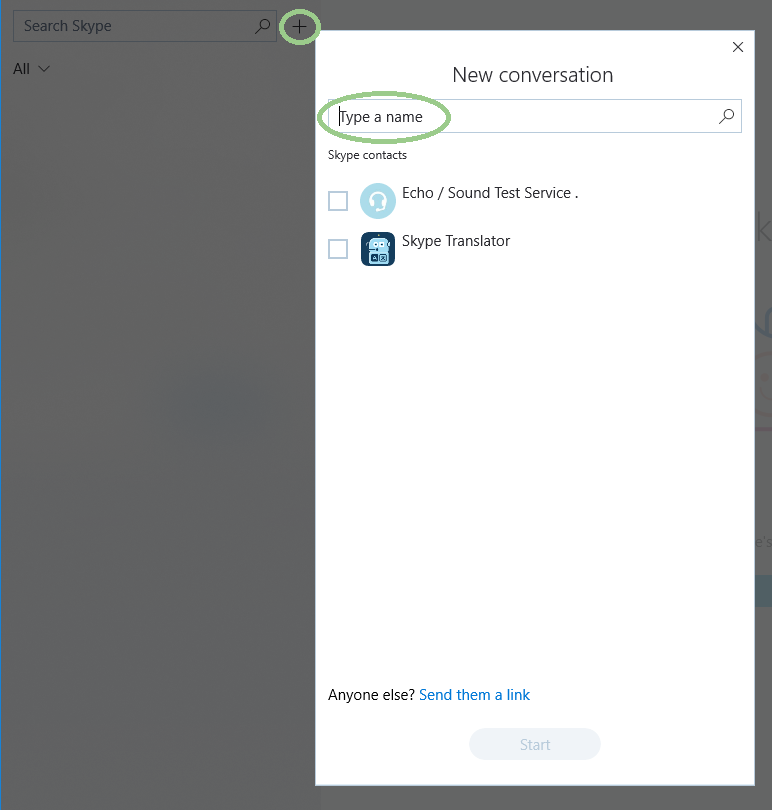
Your friends and family may already have told you their Skype names. In this case, simply type those into the search bar - the people you are looking for should pop up. If not, in this guide to Skype we’d advise you try searching for their phone number or email address, if you have it.
Once the right people pop up below the search bar, simply slick “add” next to their names. They will now be on your contacts list.
5. Make a call
Next in our guide to Skype, to make your first Skype call, find the new contact you’ve added to the contact list and click their name. A conversation box should open on the right of your screen.
Choose the film camera button at the top left to start making a video call or choose the telephone button to make a voice call without video. You can also type messages into the chat box at the bottom to communicate.
You are now on your way to staying connected with loved ones whether they live down the road or across the pond!
Feeling connected and keeping in touch with friends and family is important for retirees. Loneliness is a growing issue affecting millions of people living in the UK. There are wonderful organisations and local charities, like Time to Talk Befriending and Guild Care, who are available to support the older community and, if you’re feeling a little lonely, read our top tips to help you beat the blues.
Are you considering moving home in your retirement? We help people aged over 60 years old move home using our Home for Life Plan and could help you to move closer to loved ones. Our aim is to help people retire happy, call our friendly team on 0800 043 4488 to find out how we could help you.
In the meantime, you can use our online Budget Booster! It's simple, quick and could provide you with a better understanding of your potential budget.